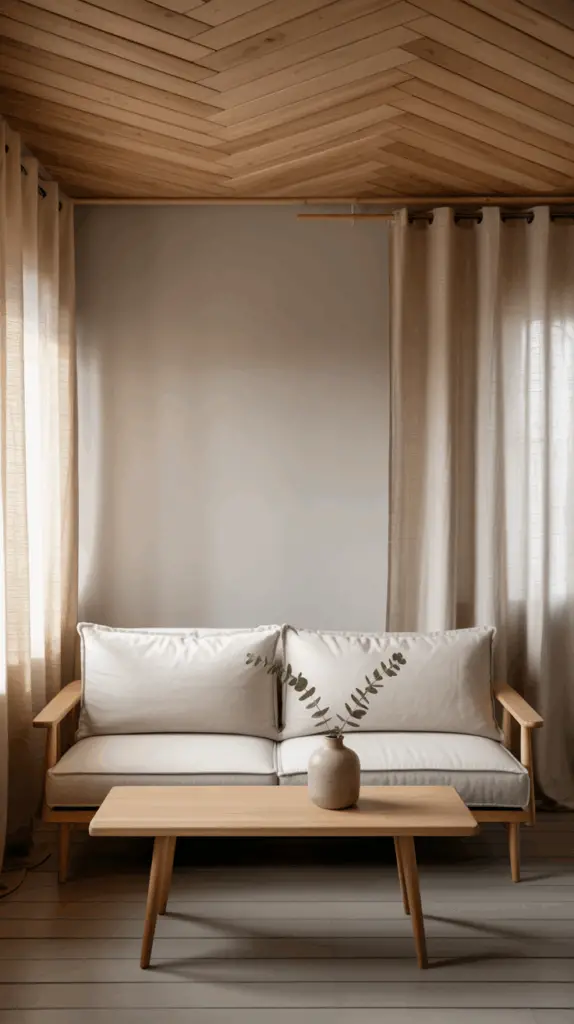
Affordable Wood Ceiling Ideas That Add Warmth and Charm to Cozy Living Spaces
Table of Contents
Amazing Cheap Wood Ceiling Ideas for Cozy Living Spaces
There’s something undeniably comforting about a room with a wood ceiling. It evokes a sense of warmth, rustic charm, and timeless elegance—yet many homeowners believe that achieving this look requires a hefty investment. The good news? With the right ideas and materials, you can create stunning wood ceilings on a budget that exude cozy vibes without compromising on style.
Wood ceiling designs have grown in popularity across all interior styles, from farmhouse to modern cottage and even boho-chic. Whether you’re looking to enhance a compact apartment or add depth to a large family room, the texture and tone of wood can elevate any space. Even more appealing is how accessible these transformations can be with cost-effective solutions.
In this guide, we’ll dive into a collection of budget-savvy wood ceiling ideas that are perfect for cozy living spaces. From repurposed materials and faux wood beams to peel-and-stick panels and painted plywood, each idea is both practical and visually pleasing. You’ll also find design tips, cost breakdowns, and visual cues to help bring your ceiling to life.
Let’s uncover how a touch of wood overhead can make your space feel more intimate, grounded, and endlessly welcoming.
Using Reclaimed Wood for Rustic Texture
Reclaimed wood is a go-to for creating a wood ceiling that feels rich in history and character—without spending a fortune. This type of wood, often salvaged from barns, old furniture, or construction leftovers, brings with it a weathered texture that’s hard to replicate with new lumber.
Because reclaimed wood varies in tone and grain, it creates a visually dynamic ceiling that draws the eye and adds interest to otherwise plain rooms. Installing it can be as simple as attaching planks directly to the ceiling joists, or adding them atop an existing drywall ceiling using construction adhesive and finishing nails.
Aside from the aesthetic appeal, reclaimed wood is environmentally friendly. By reusing materials, you’re not only saving money but also reducing your carbon footprint.
Installation Tips
- Clean and seal the wood before installation to avoid pests or moisture issues.
- Use a stud finder to locate secure joists for nailing.
- Mix and match plank tones for a more eclectic look.
Cost Breakdown Table: Reclaimed Wood Ceiling
| Item | Estimated Cost (per sq. ft.) | Notes |
| Reclaimed wood planks | $1.00 – $3.00 | Source from salvage yards or online |
| Adhesive & nails | $0.50 | Needed for mounting |
| Sealer or stain (optional) | $0.25 – $0.75 | Enhances durability and finish |
Peel-and-Stick Wood Planks for Effortless Charm
Peel-and-stick wood ceiling planks have revolutionized DIY home décor. These lightweight, adhesive-backed panels are an excellent option for renters or homeowners looking for a quick upgrade without the hassle of major tools or construction.
Made from real wood veneer or engineered material, peel-and-stick panels mimic the look of natural wood without the cost or weight. Installation is straightforward—clean the surface, peel the backing, and press the panels into place. They work especially well on smooth ceilings, such as painted drywall or plaster.
Not only do they look great, but they also allow for design flexibility. You can create herringbone patterns, diagonal runs, or simple horizontal lines based on your room’s style.
Design Considerations
- Opt for lighter wood tones in small spaces to keep the ceiling from feeling heavy.
- Mix wood with soft neutral walls to keep the space feeling open and cozy.
- Ensure the ceiling surface is clean and dry before applying.
Table: Pros and Cons of Peel-and-Stick Planks
| Pros | Cons |
| Easy DIY installation | Not ideal for textured ceilings |
| Affordable and lightweight | Limited long-term durability |
| Variety of finishes and tones | Adhesive may lose grip in humid rooms |

Faux Wood Beams for Architectural Interest
If you love the look of exposed ceiling beams but not the cost or structural work involved, faux wood beams are a brilliant alternative. Made from lightweight polyurethane or MDF, these beams look surprisingly realistic and are available in a range of wood tones and textures.
Faux beams can be installed over any flat ceiling and don’t require major renovations. They can run parallel or crosswise, depending on the desired visual effect, and are often hollow to allow for concealing wiring or ceiling fixtures.
They’re especially useful for breaking up large ceiling expanses and adding depth to flat or modern spaces that feel cold or sterile.
Practical Tips
- Choose a beam color that contrasts with your ceiling for visual impact.
- Use beam placement to draw attention to focal areas, like above a fireplace or sectional sofa.
- Combine with dimmable recessed lights for a dramatic effect.
Table: Step-by-Step Faux Beam Installation
| Step | Description |
| 1. Measure | Determine beam placement and length |
| 2. Mark | Use chalk line to outline beam positions |
| 3. Mount | Attach mounting blocks to the ceiling |
| 4. Install | Slide faux beams over blocks and secure |

Painted Plywood Ceilings for a Modern Cottage Look
Plywood is a budget hero when it comes to wood ceilings. When installed in panels and painted in soft, warm hues, plywood brings a clean yet textured finish that aligns perfectly with cozy, modern cottage interiors.
You can leave plywood natural for a minimalist Scandinavian effect or paint it white, beige, or muted sage for a more curated and finished look. The grain still subtly shows through, offering an organic feel that drywall can’t replicate.
Installation typically involves screwing the plywood sheets directly into ceiling joists, then filling seams and screw holes before finishing. For a shiplap effect, opt for grooved panels or cut strips.
Helpful Design Advice
- Choose birch or maple plywood for a smooth surface and minimal knots.
- Paint in matte or eggshell finish to keep light diffusion soft.
- Add crown molding around edges for a refined touch.
Table: Budget Breakdown for Painted Plywood Ceiling
| Item | Estimated Cost (per sq. ft.) | Notes |
| 1/4″ Plywood sheet | $0.70 – $1.00 | Comes in 4×8 sheets |
| Paint + primer | $0.50 – $0.80 | Choose low-VOC for indoor use |
| Screws + filler | $0.30 | Tools for mounting and finishing |
Beadboard Ceilings for Traditional Cottage Appeal
Beadboard is a classic wood ceiling treatment that offers texture, rhythm, and a cottage-like charm that feels especially homey in small or enclosed living areas. While traditionally used on walls, beadboard panels or planks can be mounted to ceilings for a subtle yet stylish finish.
Available in MDF or real wood, beadboard is affordable and easy to paint, allowing you to customize your look. It works especially well in homes with wainscoting, wood floors, or vintage fixtures.
When paired with soft lighting and layered textiles, beadboard ceilings help define cozy, intimate zones within an open floor plan.
Things to Keep in Mind
- MDF beadboard is cheaper but less resistant to humidity.
- Pre-primed panels save time and effort during installation.
- Use beadboard with crown molding for a polished appearance.
Comparison Table: MDF vs. Real Wood Beadboard
| Feature | MDF Beadboard | Real Wood Beadboard |
| Cost | Lower | Higher |
| Durability | Moderate | High |
| Paint Absorption | Excellent | Moderate |
| Moisture Resistance | Low | High (when sealed) |
Stained Pallet Wood Ceilings for DIY Enthusiasts
For a rustic, handcrafted look, pallet wood is an excellent choice. Many DIYers love this material because it’s free or nearly free, readily available, and full of character. With a bit of sanding and staining, pallet boards can become a unique ceiling treatment that looks far more expensive than it is.
Because the boards are narrow and irregular, pallet wood ceilings are best suited for smaller rooms or as a feature ceiling within a larger area. Use natural stains to highlight imperfections and grain for added depth.
Be sure to choose clean, heat-treated (not chemically treated) pallets, and inspect for nails or contaminants before use.
DIY Tips
- Sand thoroughly to remove rough edges and splinters.
- Stain in batches for color consistency.
- Use brad nails or construction adhesive for mounting.
Table: Pallet Ceiling DIY Prep Checklist
| Task | Reason |
| Disassemble pallets | Get usable boards |
| Clean and sand | Prepare surface for staining |
| Stain and seal | Enhance color and durability |
| Pre-measure layout | Ensure a balanced arrangement |
Mixing Wood with Other Ceiling Materials for Contrast
If going all-wood feels overwhelming or too costly, consider combining wood elements with other ceiling materials such as drywall, tin tiles, or painted surfaces. A few strategically placed wood features—like beams, a central medallion, or perimeter trim—can give you the cozy factor without committing fully to wood.
This approach works especially well in eclectic or transitional interiors where contrast adds richness. Try framing a wood inlay within a plaster ceiling, or using wood tongue-and-groove panels in just one area, like above the sofa or dining space.
Creative Pairings
- Wood beams + white painted ceiling = clean + warm
- Wood medallion + pendant light = striking focal point
- Wood border trim + plaster = subtle texture
Table: Wood Combination Ideas by Style
| Style | Wood Pairing Suggestion |
| Boho | Wood inlay with textured plaster |
| Transitional | White ceiling with wood beams |
| Rustic modern | Wood plank center + metal edge |
Conclusion
Bringing a cozy, inviting ambiance into your living space doesn’t have to be expensive or complicated. Whether you choose rustic reclaimed planks, elegant faux beams, or quick peel-and-stick panels, there’s a budget-friendly wood ceiling idea that suits your home and style.
These ceiling treatments not only add warmth and character but also enhance the architecture and personality of any room. With thoughtful planning and a creative approach, even the simplest material can transform a ceiling from overlooked to outstanding.
Wood, in all its forms, offers timeless appeal—and when applied smartly, it can make your living space feel like home from top to bottom.

